
3D printer is the latest gizmo attracting a lot of attentions. Companies like MakerBot are making 3D printers more and more affordable, and these machines are now finding their way into high school machine shops and engineering offices alike.

MakerBot Replicator 2.
Recently, I came across a MakerBot Replicator 2 while working on a project. I was the first one to try it out. The assembly was straightforward, with some manual calibration of the vertical stage where you are asked to turn three knobs such that the distance between the print head nozzle and the stage at various points is the thickness of a sheet of paper.
The printer’s mechanical is deceptively simple–a box frame with a motorized stage that travels vertically (Z-plane), and a heated printer head travels horizontally, in the X-Y plane. The neon blue back-light adds to the printer’s mysteriousness (I thought the light might be UV curing agent). Stepper motors were used with ball-bearing linear slider and some rubber belts.
The print head is clearly where the magic is. It dispenses thin strings of molten plastic called PolyActic Acid (PLA), much like a how a spider weaves a web. The thickness of the string is no more than that of one strand of hair. The printer forms a 3D model by “drawing” the model’s cross-section a layer at a time. The molten PLA hardens and bonds with the previous layer as soon as it is deposited.
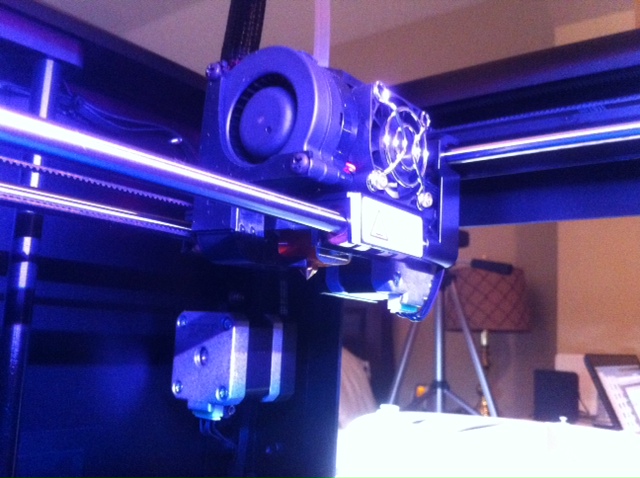
Print head.
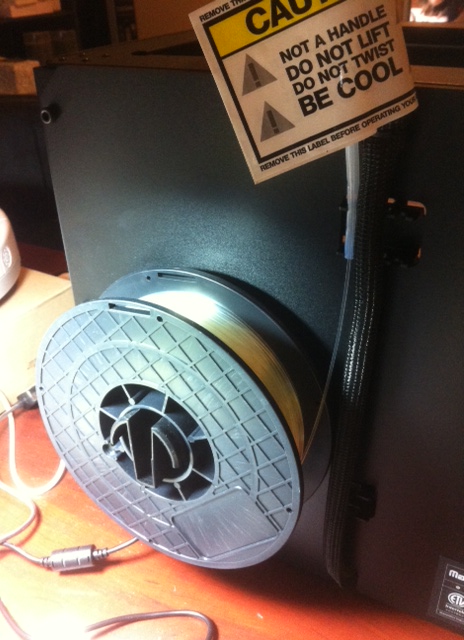
The print head assembly has a cooling fan and a heater. The fan is necessary to keep the printer head from overheating. The PLA filament is fed through a tube into the print head where it is heated. The filament comes from a spool mounted at the back of the printer. These filaments come in different colour, and cost about $25 to $60 USD a spool, depending on the size and where you buy it from.
Precise temperature control of the print head is critical. The printer won’t start until a temperature of 230°C is reached. Until then, the print head may “drool” a little PLA. Just snap it off when you are ready to begin. The temperature can be monitored from the LCD display located at the bottom right of the printer.
PLA filament spool.
I found several sticky blue contacts sheets that in the shipping box when I opened it. I decided it was to be taped to the stage for protection. During printing, the PLA “string” is deposited right on the sheet. Later I discovered that the sheets ease the lifting of the printed model from the stage.
A SD card slot situated above the LCD display allows the Replicator to read STL files off the SD card. To help people like me who have no patience, the Replicator 2 also comes with several pre-made models. For my inaugural print, I chose the “stretchable” bracelet for its complex pattern. Plus I really want to see it stretch! Below is a short video showing the Replicator 2 printing the bracelet, which took about 22 minutes.

The completed stretchable bracelet.
To create your own model, you will need a 3D modelling tools like SolidWorks and FreeCAD. If you’re like me, the “Free” in FreeCAD immediately drew my attention, so I downloaded it and test drove it. FreeCAD is a parametric 3D modelling tool that is fairly easy to use. Complex model can be constructed from simple geometries like cubes and spheres using operators like union, difference and intersection; collectively this method of 3D construction is known as Constructive Solid Geometry. FreeCAD is available on Linux, Mac and Windows, which completely takes away operating system allegiance when it comes to “to-use or not-to-use” decision.
MakerBot also offer free download of their visualization software, called MakerWare. This tool allows you to visualize the object you’re printing, and do some minor cropping/editing and reorienting before sending the data to MakerBot to print, via USB. SD card is not needed in this case.

FreeCAD screen shot.
If you designed something cool, you can put it on the Thingverse. “Thing” is the name that MakerBot calls ready-made 3D models. In fact, they created an online market place of called Thingverse, where one can buy and download STL files of cool 3D models and print them. It’s like iTune of 3D model.
In summary, I found MakerBot Replicator 2 easy to set up and use. While the $2,300 price tag may be a little steep for some, the ability to rapidly prototype a design straight off your desktop is well worth the money. Think about the cost of the alternatives–renting time on the milling machine from local shop? Designing and creating a plastic moulding? I think not. Plus, to see my daughter’s amazement as she watches something materializing before her eyes is simply priceless.
(The above article is solely the expressed opinion of the author and does not necessarily reflect the position of his current and past employers)